Quick Start — Presenter
This guide walks you through creating a poll, running a live session, and controlling the audience experience.
Presenter Workflow
Prerequisites
- A NextGenPoll account (sign in at nextgenpoll.com)
- Questions prepared in advance (or you can create them on the fly)
1. Create a Poll
- Sign in and navigate to My Spaces using the sidebar.
- Select a Workspace and Space from your sidebar hierarchy, or create a new one.
- Click New Poll inside your selected space.
- Give your poll a name.
- Click Create — you will be taken to the poll editor.
Instead of creating a poll from scratch, you can Clone an existing one. Look for the Clone icon on any poll card to copy its questions and settings to a new space. See Spaces & Polls for details.
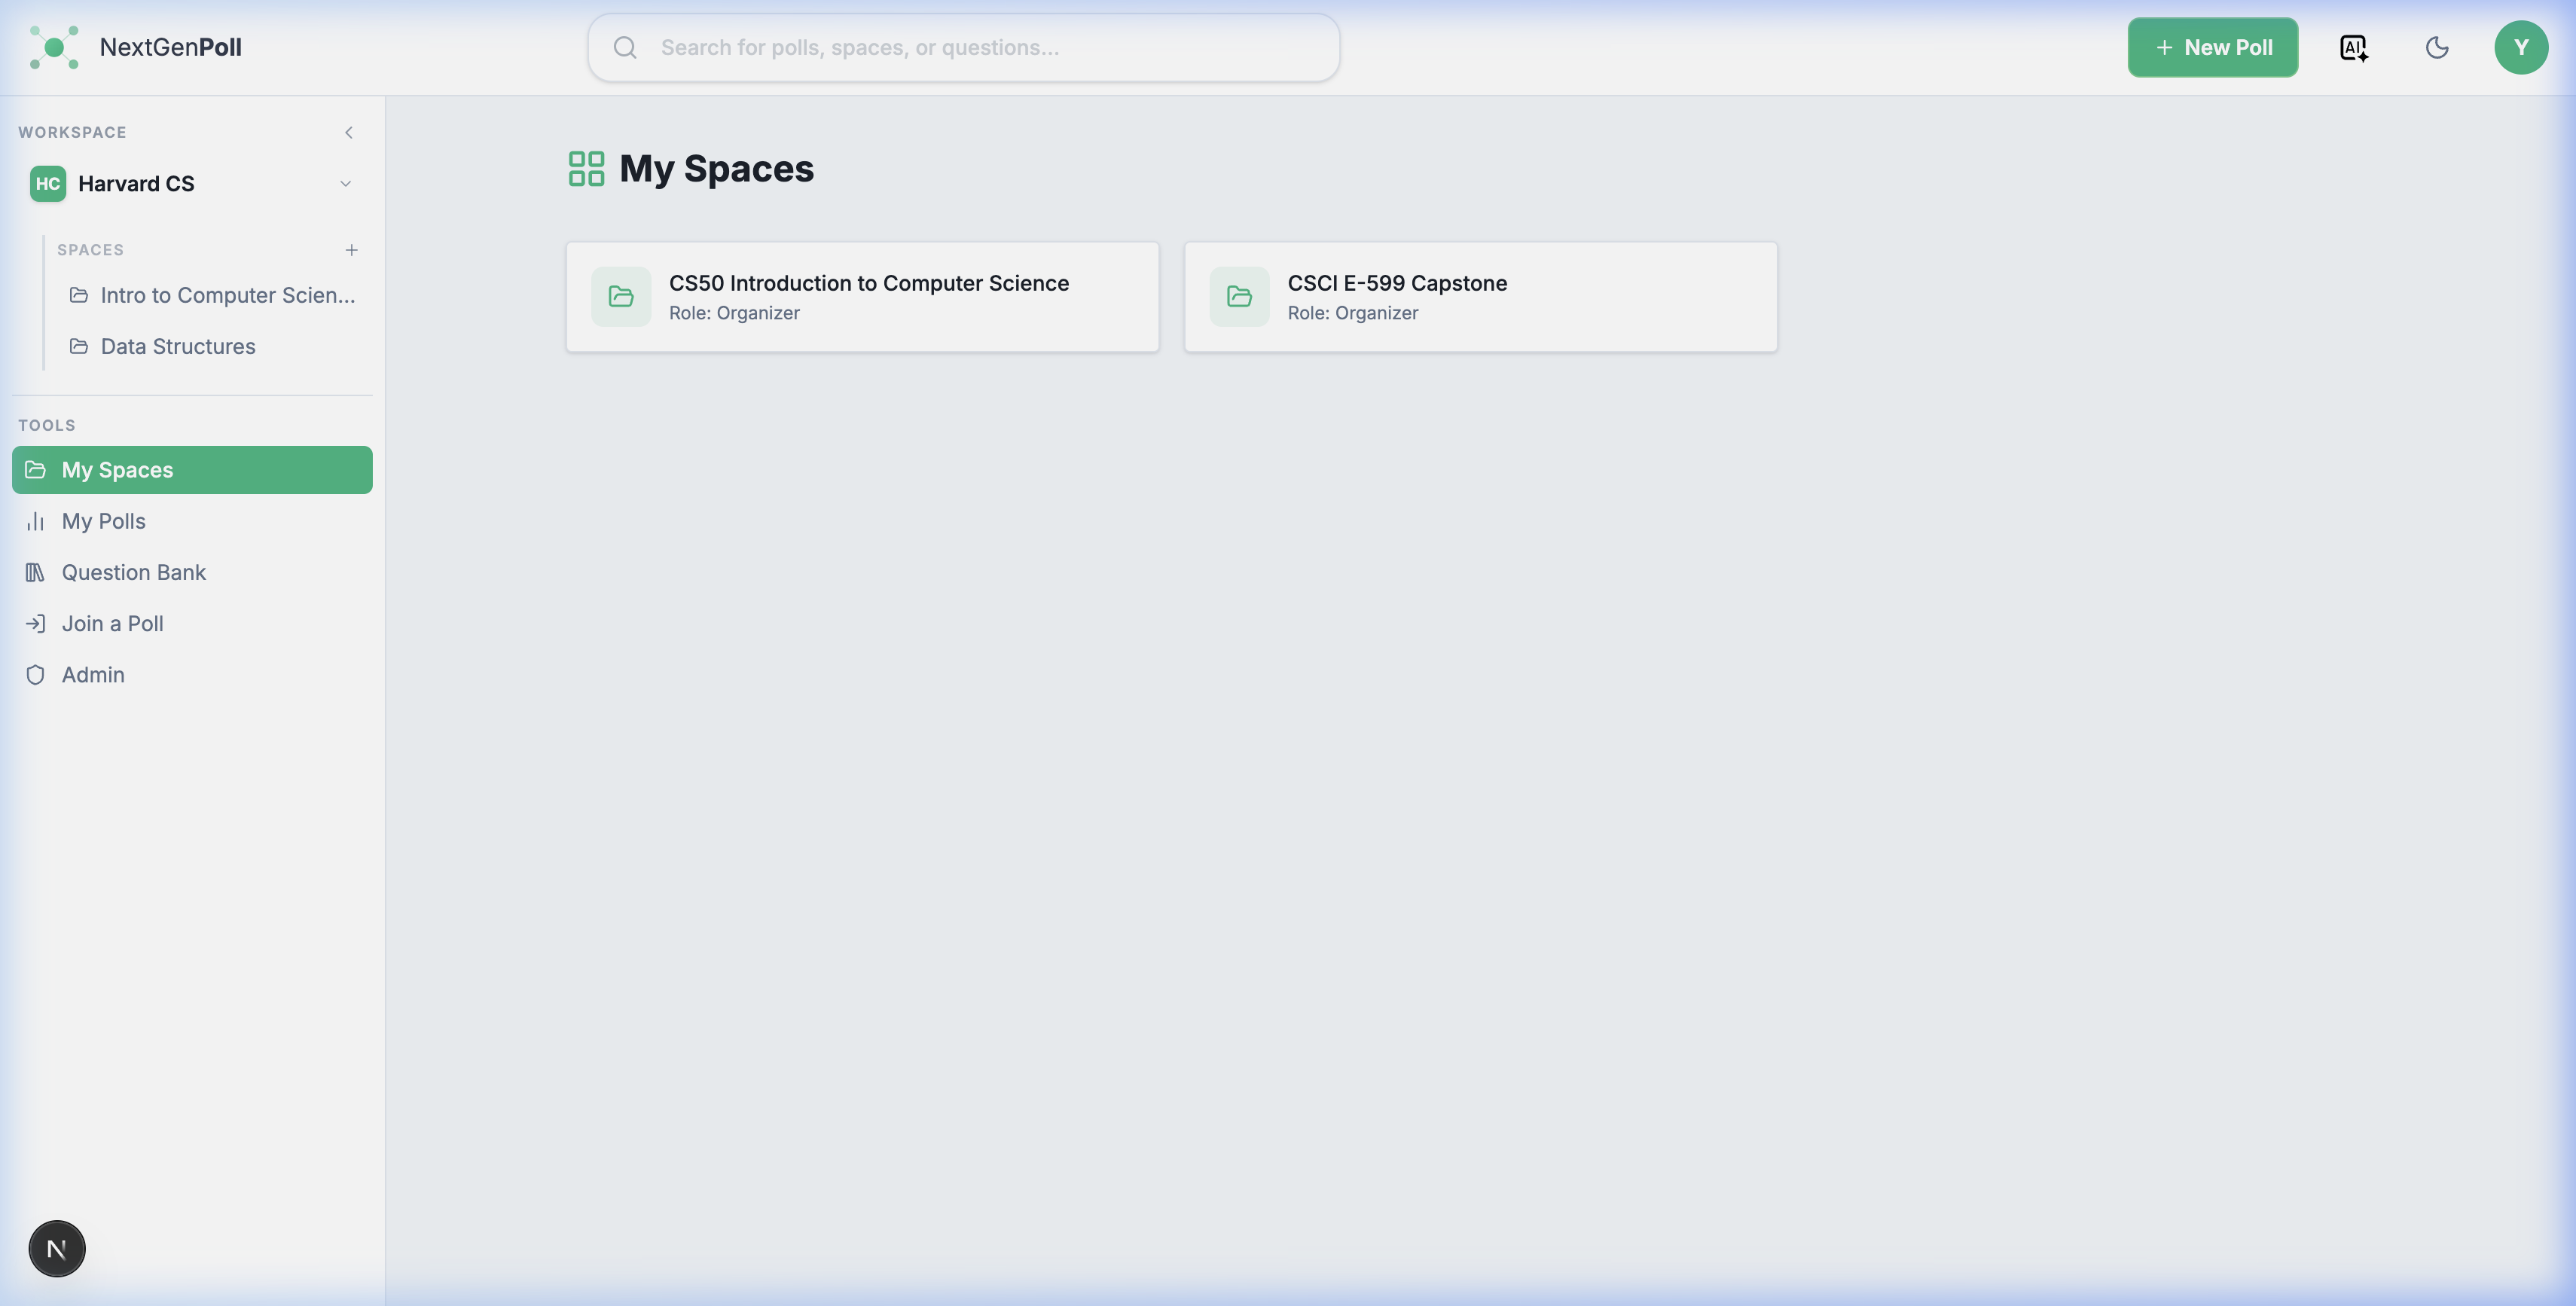
Figure 2: The NextGenPoll Dashboard highlighting space management and poll creation.
2. Add Questions
Inside the poll editor:
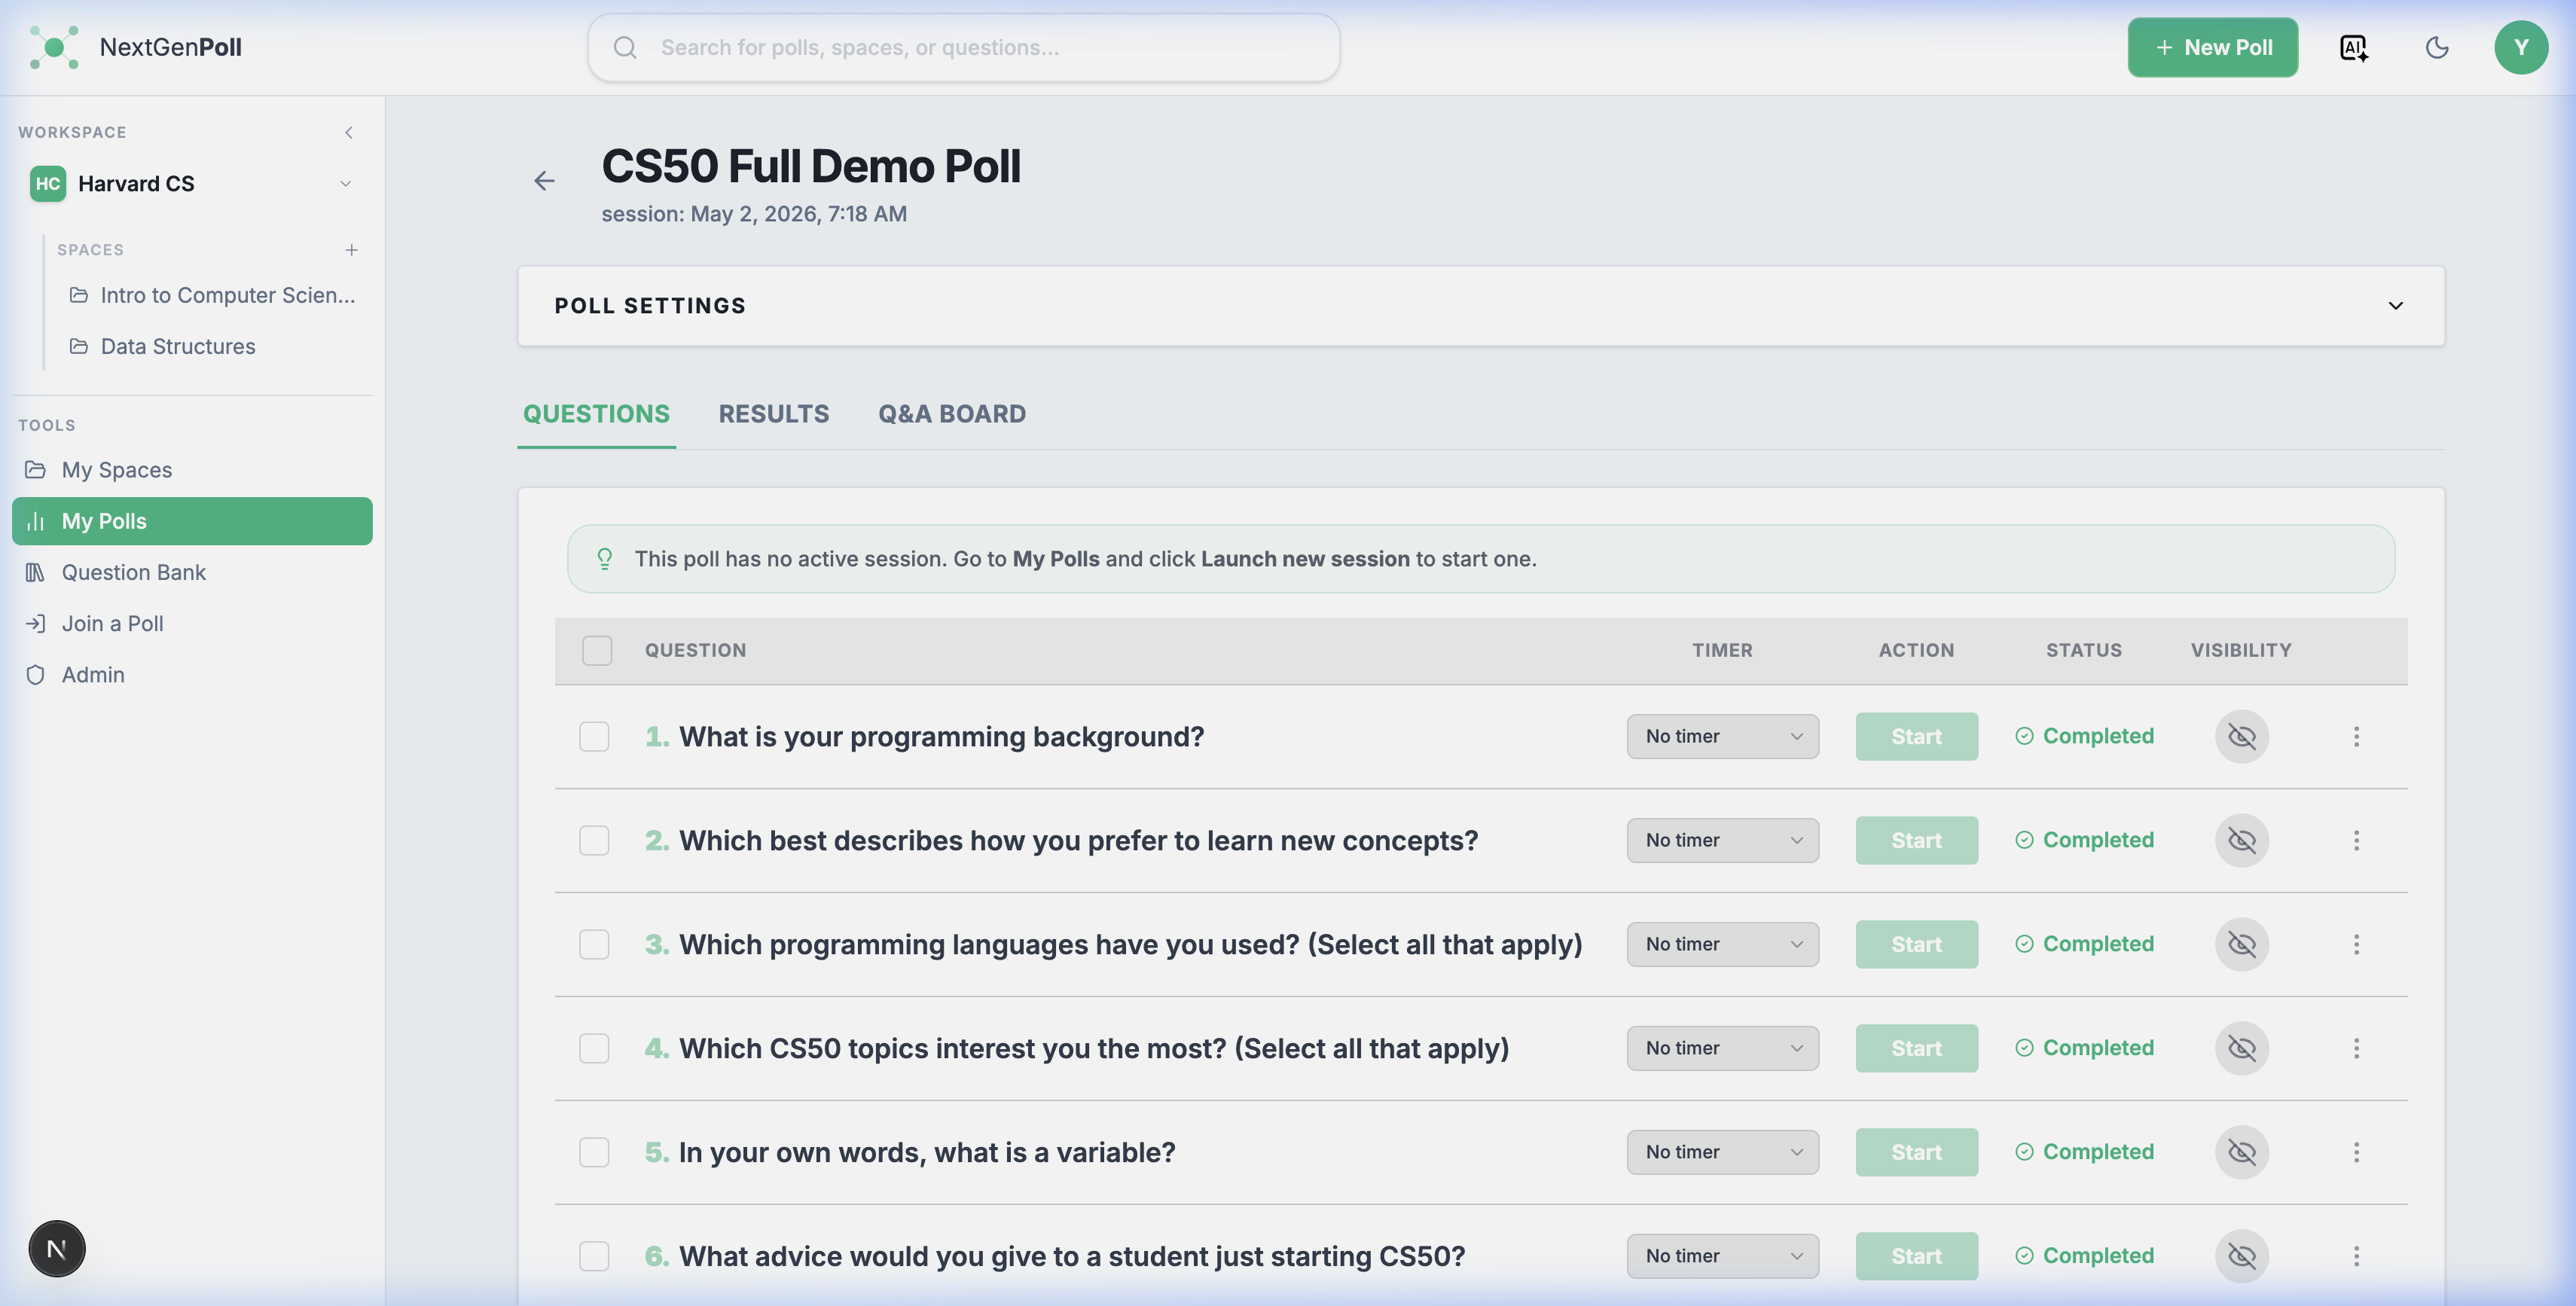
Figure 3: The Poll Editor where questions are created and managed.
- Click Add Question.
- Choose a question type (see Question Types for all options).
- Enter your question text and configure options (e.g., answer choices for Multiple Choice, min/max for Slider).
- Click Save.
Repeat for each question. You can drag and drop questions to reorder them in the grid.
Frequently-used questions can be saved to and reused from the Question Bank. You can access the Question Bank anytime from the Tools section at the bottom of the sidebar.
3. Configure Poll Settings
In the poll editor, you can adjust settings like:
| Setting | Options |
|---|---|
| Anonymous responses | On (default) / Off |
| Q&A enabled | On / Off — lets participants submit questions to the Q&A board |
4. Launch a Live Poll Run
From the poll editor or the space poll list:
- Click Launch new session (if starting fresh) or Resume session (if reopening an active poll).
- The interface switches to the Presenter View.
- A join code and QR code are displayed at the top — share these with your audience.
5. Control the Session
From the Presenter View, you manage the live flow of the poll.

Start a Question
Select one or more questions using the checkboxes, then click Start in the floating bulk action bar at the bottom. This makes the question visible to participants.
Watch Live Results
Results update in real time as participants respond.
Change the Visualization
While a question is active, use the Format column dropdown to switch between available chart types (Bar, Pie, Word Cloud, etc.). Participants will see the same chart update live.
Set a Timer
Use the timer column to add a countdown. The question closes automatically when the timer expires.
Stop a Question
Select active questions and click Stop from the bulk action bar to stop accepting new responses.
Session Lifecycle
Understanding the states of a poll session is key to managing your audience flow:
- Lobby: The session is open, but no questions are active. Participants see a "Waiting" screen.
- Active: One or more questions are open for responses.
- Results: Responses are no longer accepted, and (if configured) results are shown to participants.
- Closed: The session is terminated for all participants.
6. Manage the Q&A Board
If Q&A is enabled, switch to the Q&A Board tab in the presenter view. Here you can:
- Review questions submitted by the audience
- Mark questions as answered
- Delete inappropriate questions
7. Leave or Close the Session
When you are done presenting, you can click the back arrow or navigate away.
- Leave Session: Keeps the poll active. Participants can still join the lobby.
- Close Session: Ends the poll run entirely and kicks participants out. Responses are locked.
After the session you can:
- Run again — activate a new session for the same poll at any time.
- Review Results — go to the space and click on the poll to review historical runs.